The existing print label tool proved too basic and insufficient. Customers demanded more control, so I designed a flexible label editor for Almego — from research and concepting to tested flows and UI design.
The result was a comprehensive, powerful environment for creating precise, customizable hazard labels based on editable templates — a solution quickly adopted by customers.
Web app for creating chemical safety and compliance documents
Design task
Big feature: Completely new hazard label editor
My role
Sole inhouse UX designer on small dev team
Years
2023
Challenge
While the core of Almego was the authoring of chemical safety data sheets (SDS), many customers also expected a built-in editor to be able to create (and print) hazard labels to put on chemical containers for showing key data such as hazard pictograms and precautionary statements. Especially in small batches for e.g. lab work or customer samples.
Although Almego had a basic tool for creating such labels, customers needed more flexibility and freedom in terms of label sizes, layout, design and content.
Initially I was actually opposing the idea of such an advanced tool, because in my view it was out of scope for Almego; we should rather focus on doing the SDS authoring well. Also, creating a sufficiently good tool would be a gargantuan task for our small team. Not least considering the competition from the dedicated, mature tools for creating labels.
However, the customers and business insisted, so we got to work.
Process
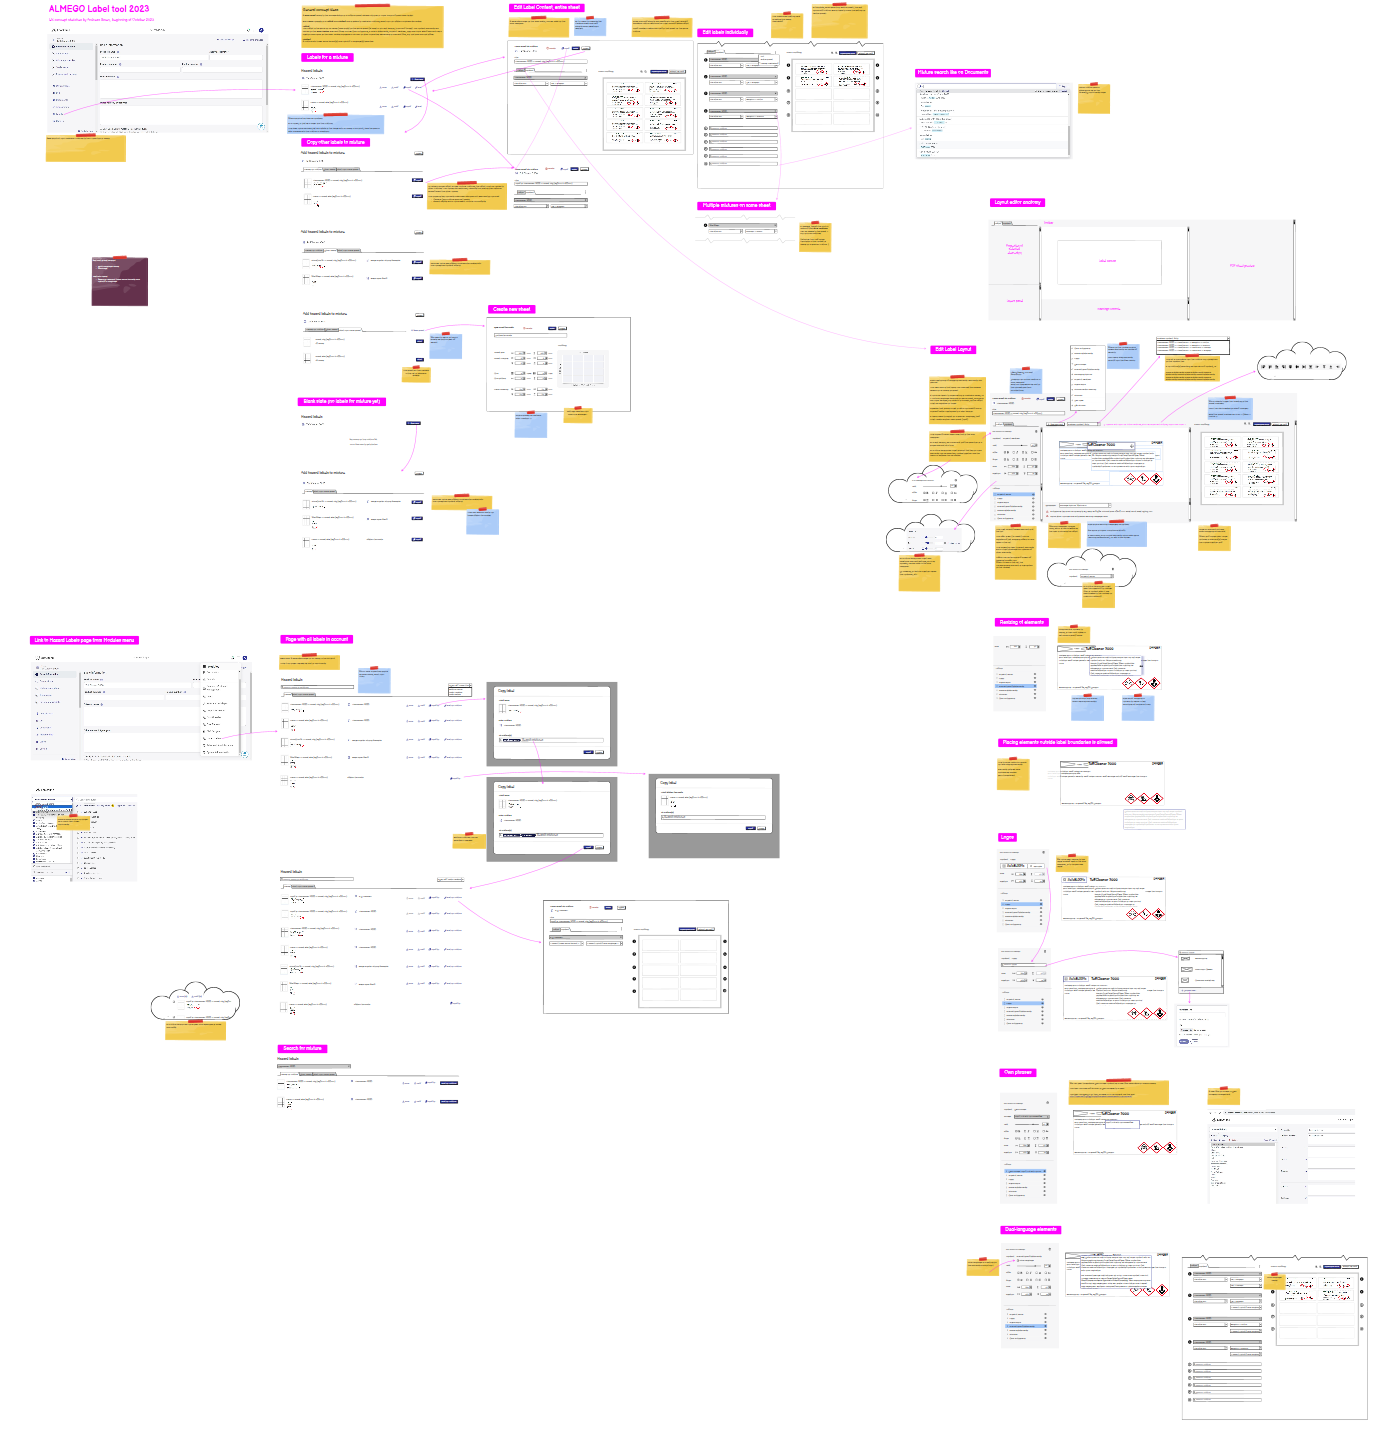
To gather requirements, we had workshops with inhouse chemical experts. We interviewed customers about their current workflows and needs. Furthermore I analyzed competing label editors.
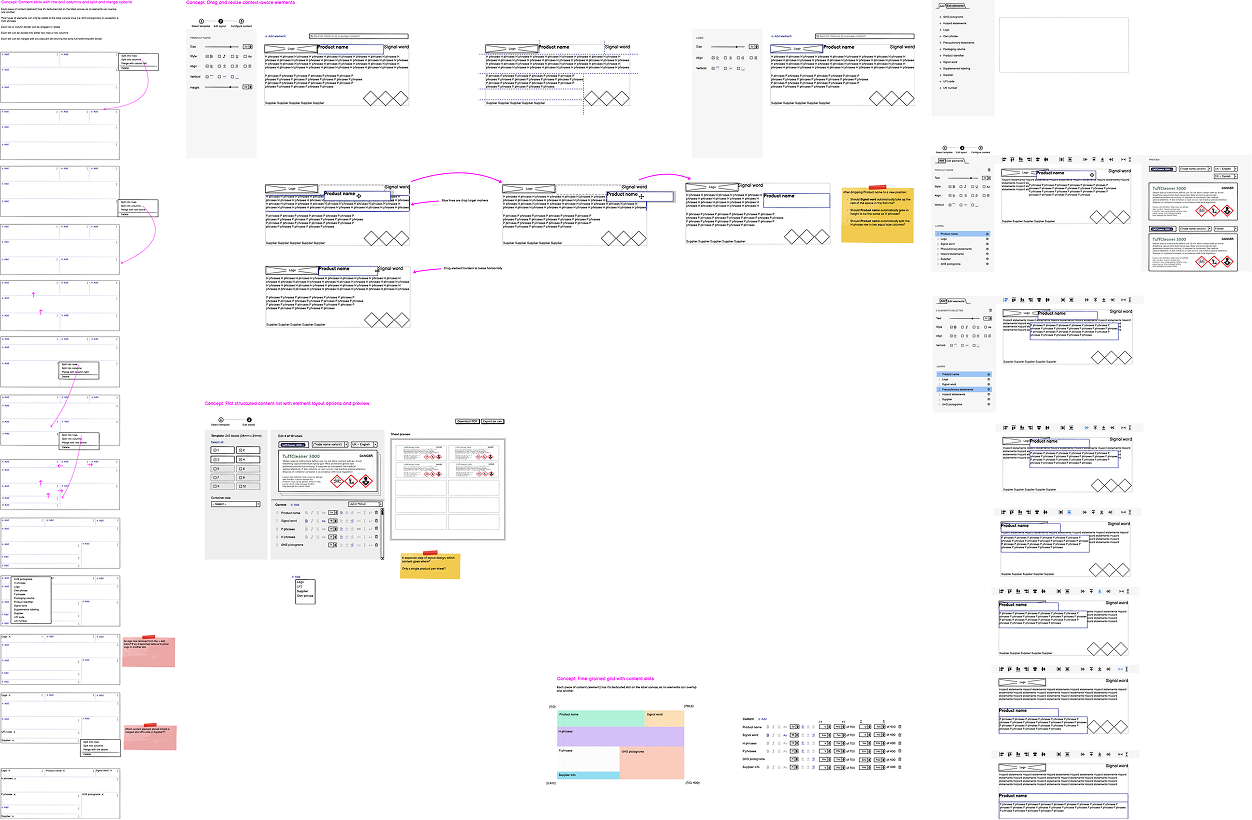
Based on that I started sketching ideas for the general concept. When deciding on the most promising concept, I started exploring flows for choosing templates, adding content and editing layout. As part of this process, I tested click-through wireframe screens with customers to find out whether the concept was understandable and would cover their needs.
The design project proved to be both interesting and very challenging since creating such an expansive tool from the ground up was no easy feat, not least in terms of concepts and flows. While I designed the UI, a developer took care of the underlying label rendering engine which had high demands for accuracy with regards to sizing and dimensions to fit different print label formats on the market.
Outcome
A working hazard label editor with a high degree of flexibility. The tool was adopted by customers, yet also showed that work still had to be done to further improve the experience.
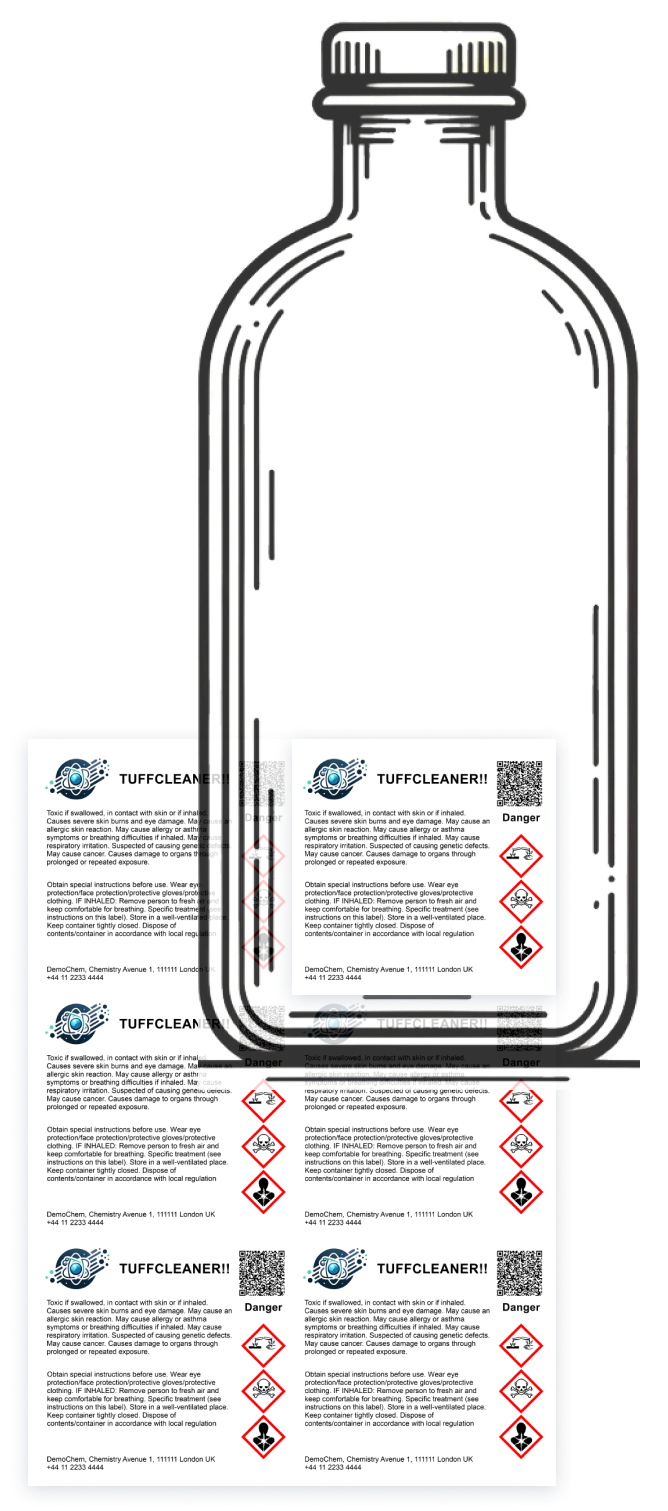
Customer need: To design and print tailored hazard labels to stick on physical product containers.
The previous version of the label editor: It worked, but was very basic, with no user control over design, layout or content elements. Compare with new design below.
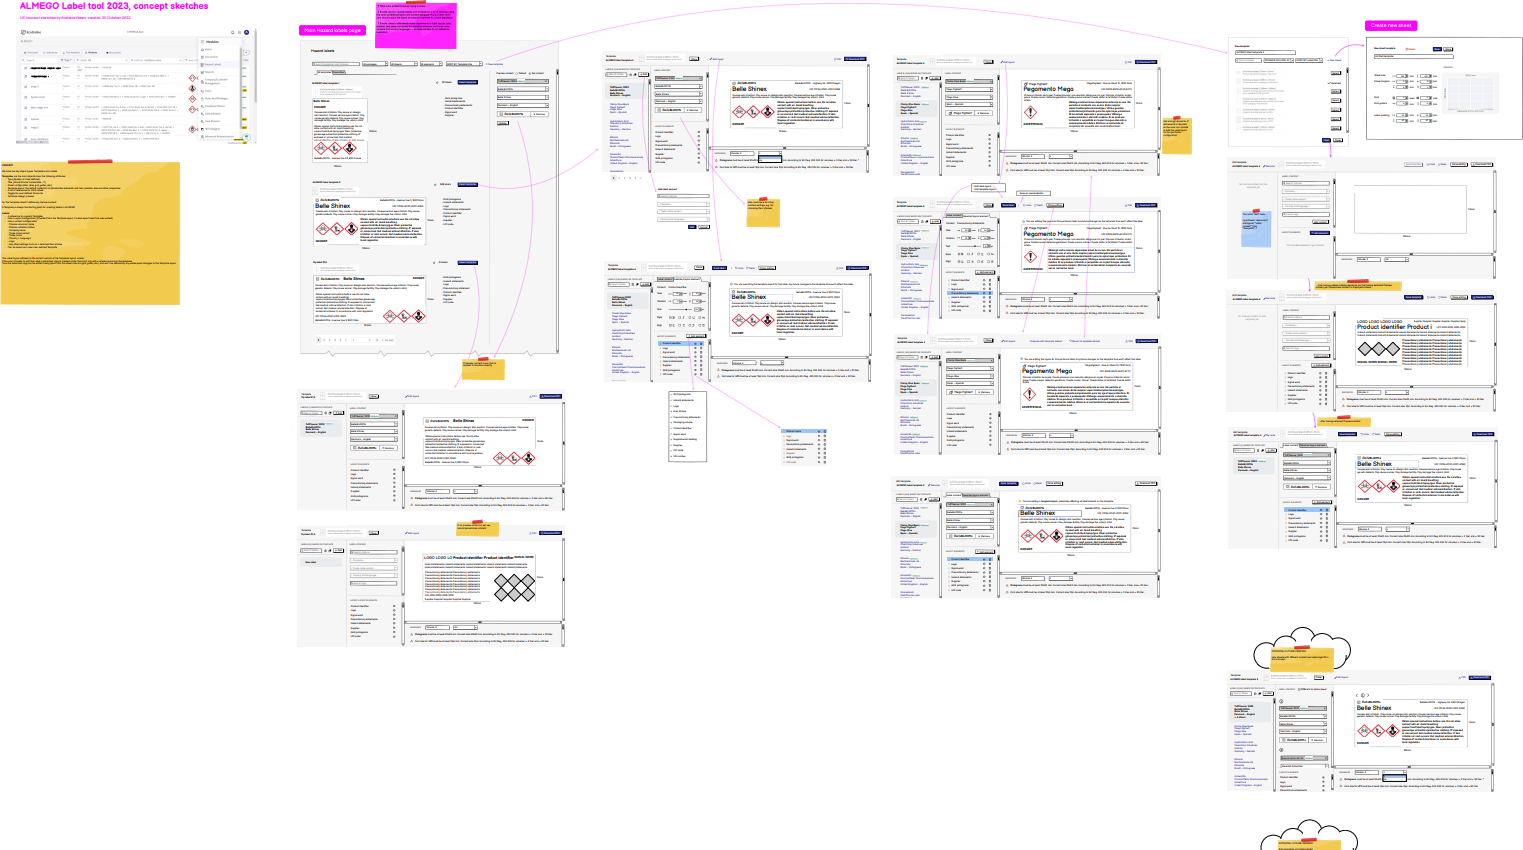
Initial general concept explorations. I wanted to find out whether we could offer a highly structured yet sufficiently flexible tool, using e.g. fixed content grids and slots.
Concept sketches where parts of the design were hard to understand according to our user testing – so it was back to the drawing board.
Intermediate concept wireflows, not too far from the final design.
There were many conceptually tricky parts, one aspect was how to communicate the difference between an instance of the template with specific content (product name, language etc.) and the template itself defining the general layout of content elements (placeholders) and their properties.
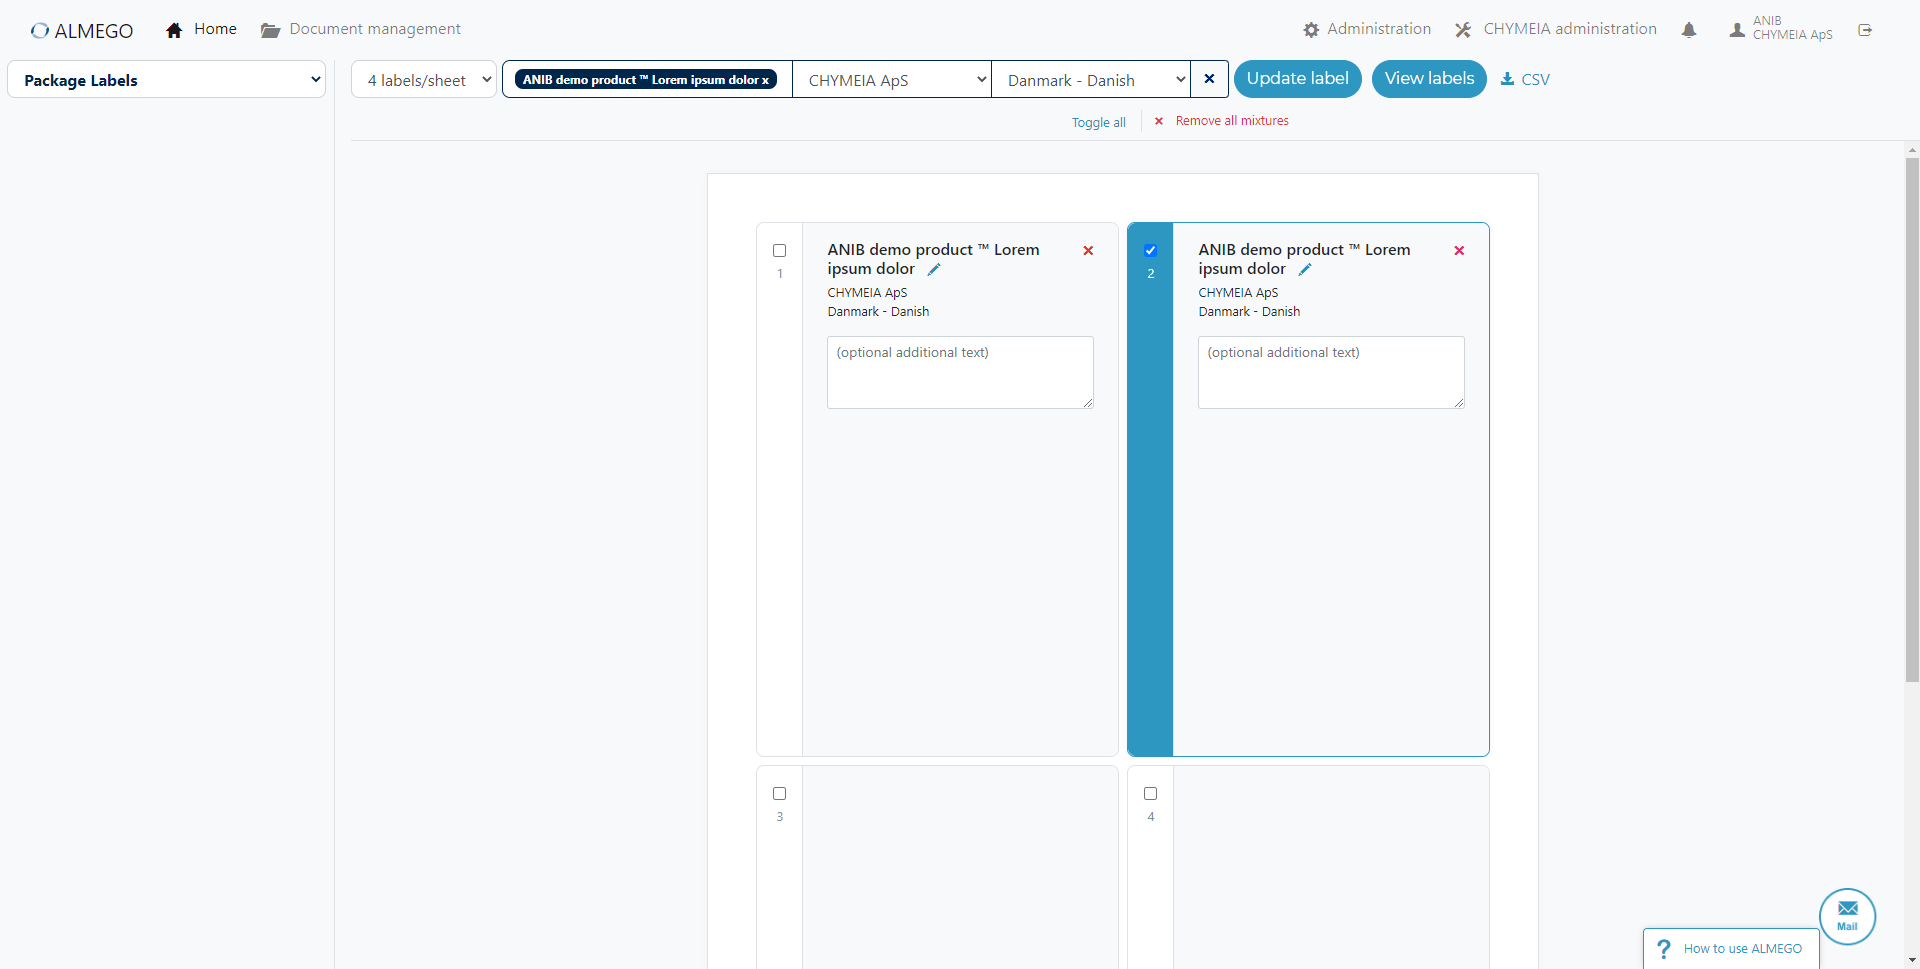
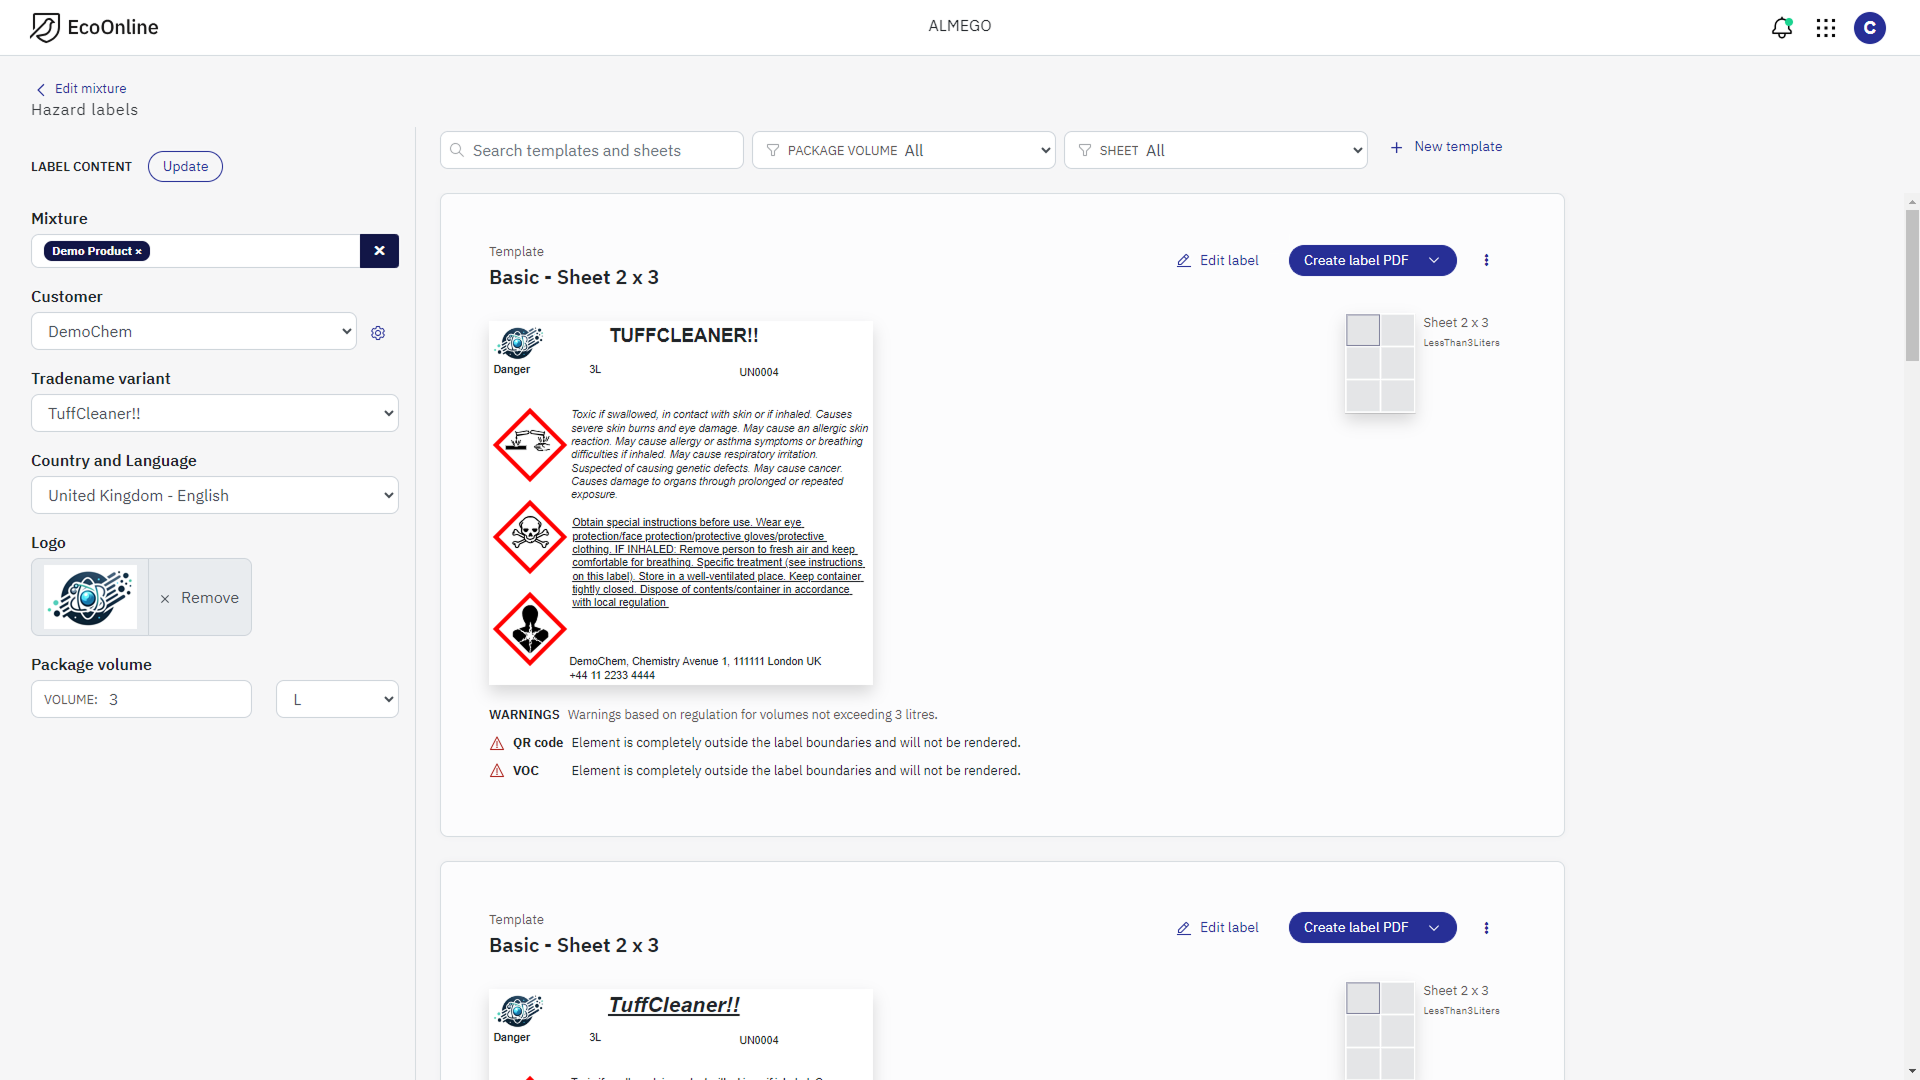
Final design — Overview of label templates previewed with content: This part of the design proved quite difficult to get right due to a mix of requirements: We wanted users BOTH to be able to preview templates with actual content, AND to create the label PDF directly if the default layout was sufficient, ALL WHILE allowing users to further edit label layout and content if needed.
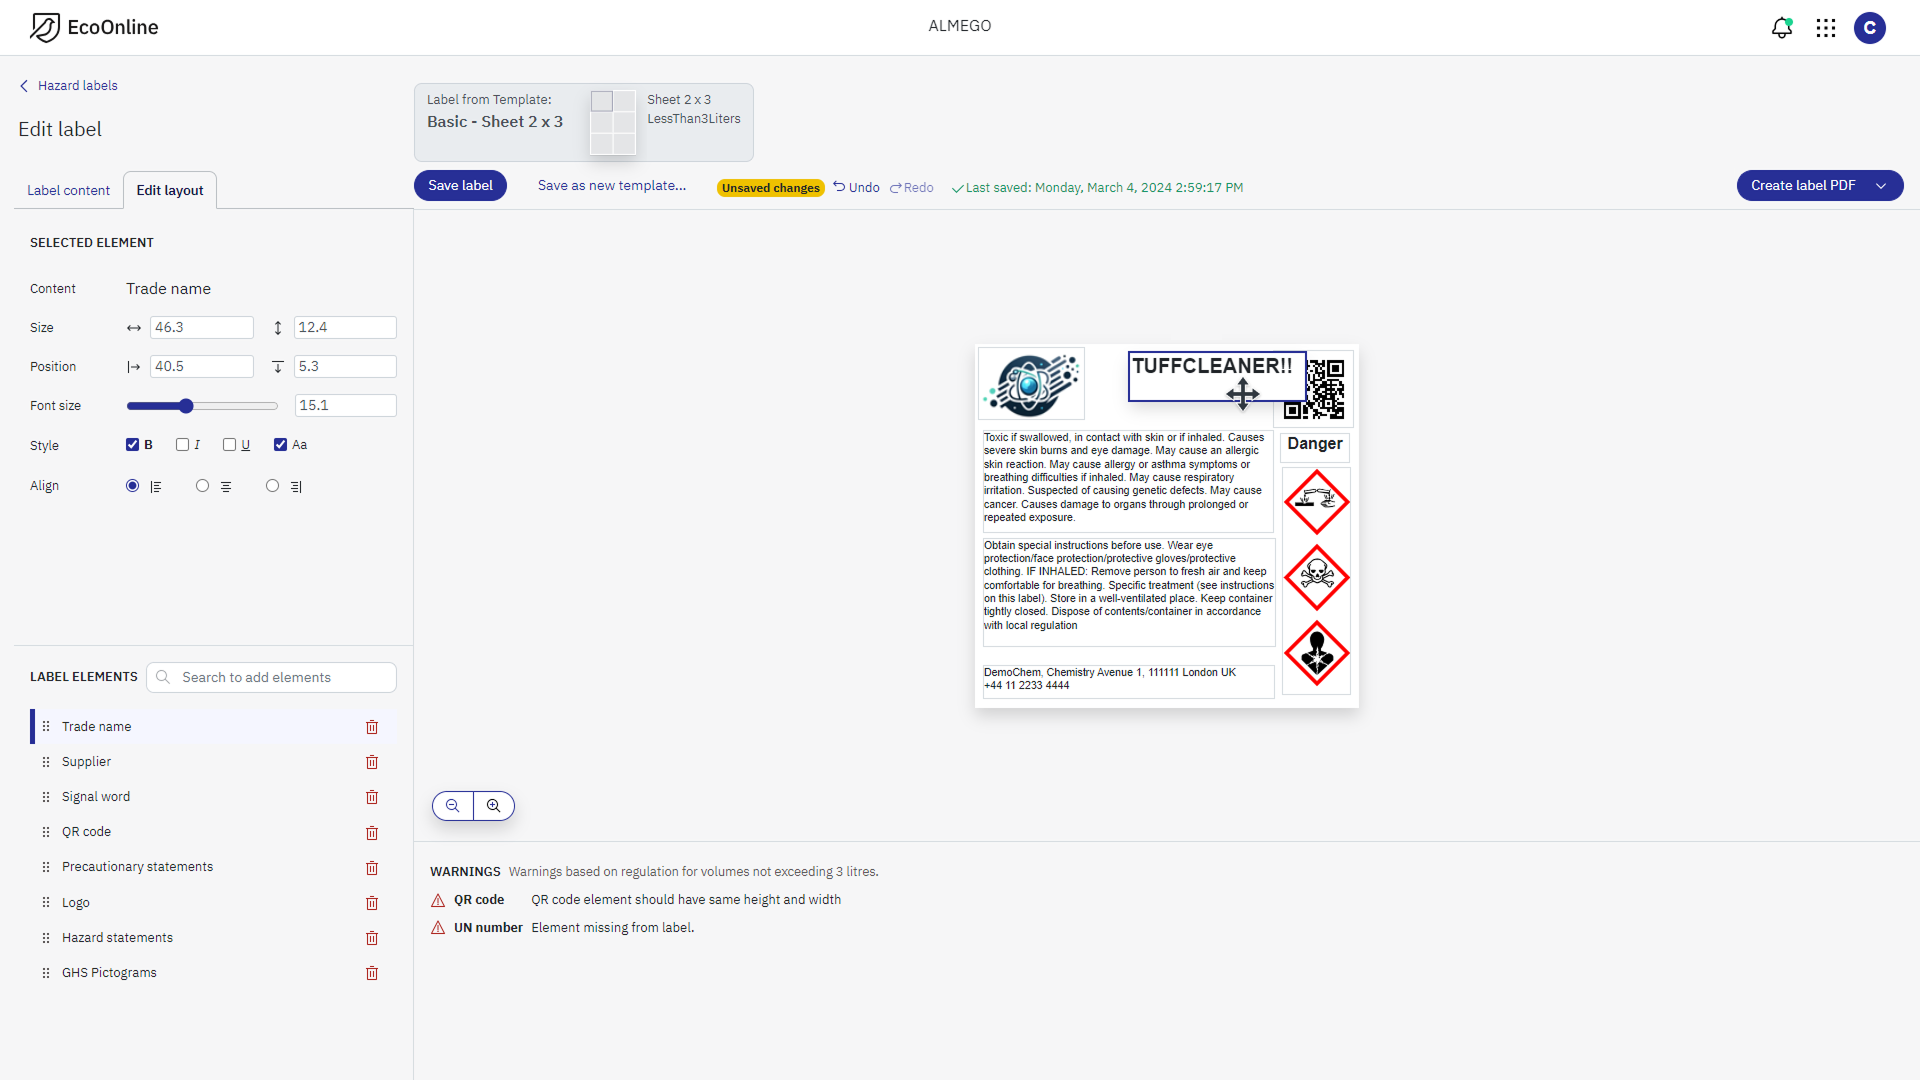
Final design — The editor environment: With the label taking center stage on the zoomable canvas, where users can freely add, remove, edit, drag and resize elements with the mouse.
We leveraged established design patterns for editors of this kind including property panels for the selected element (center left) and a layers panel of added content elements (bottom left). A nifty feature (bottom center) was live warnings whether the design adhered to the regulatory demands established by the chemical authorities. Compare with previous design above.
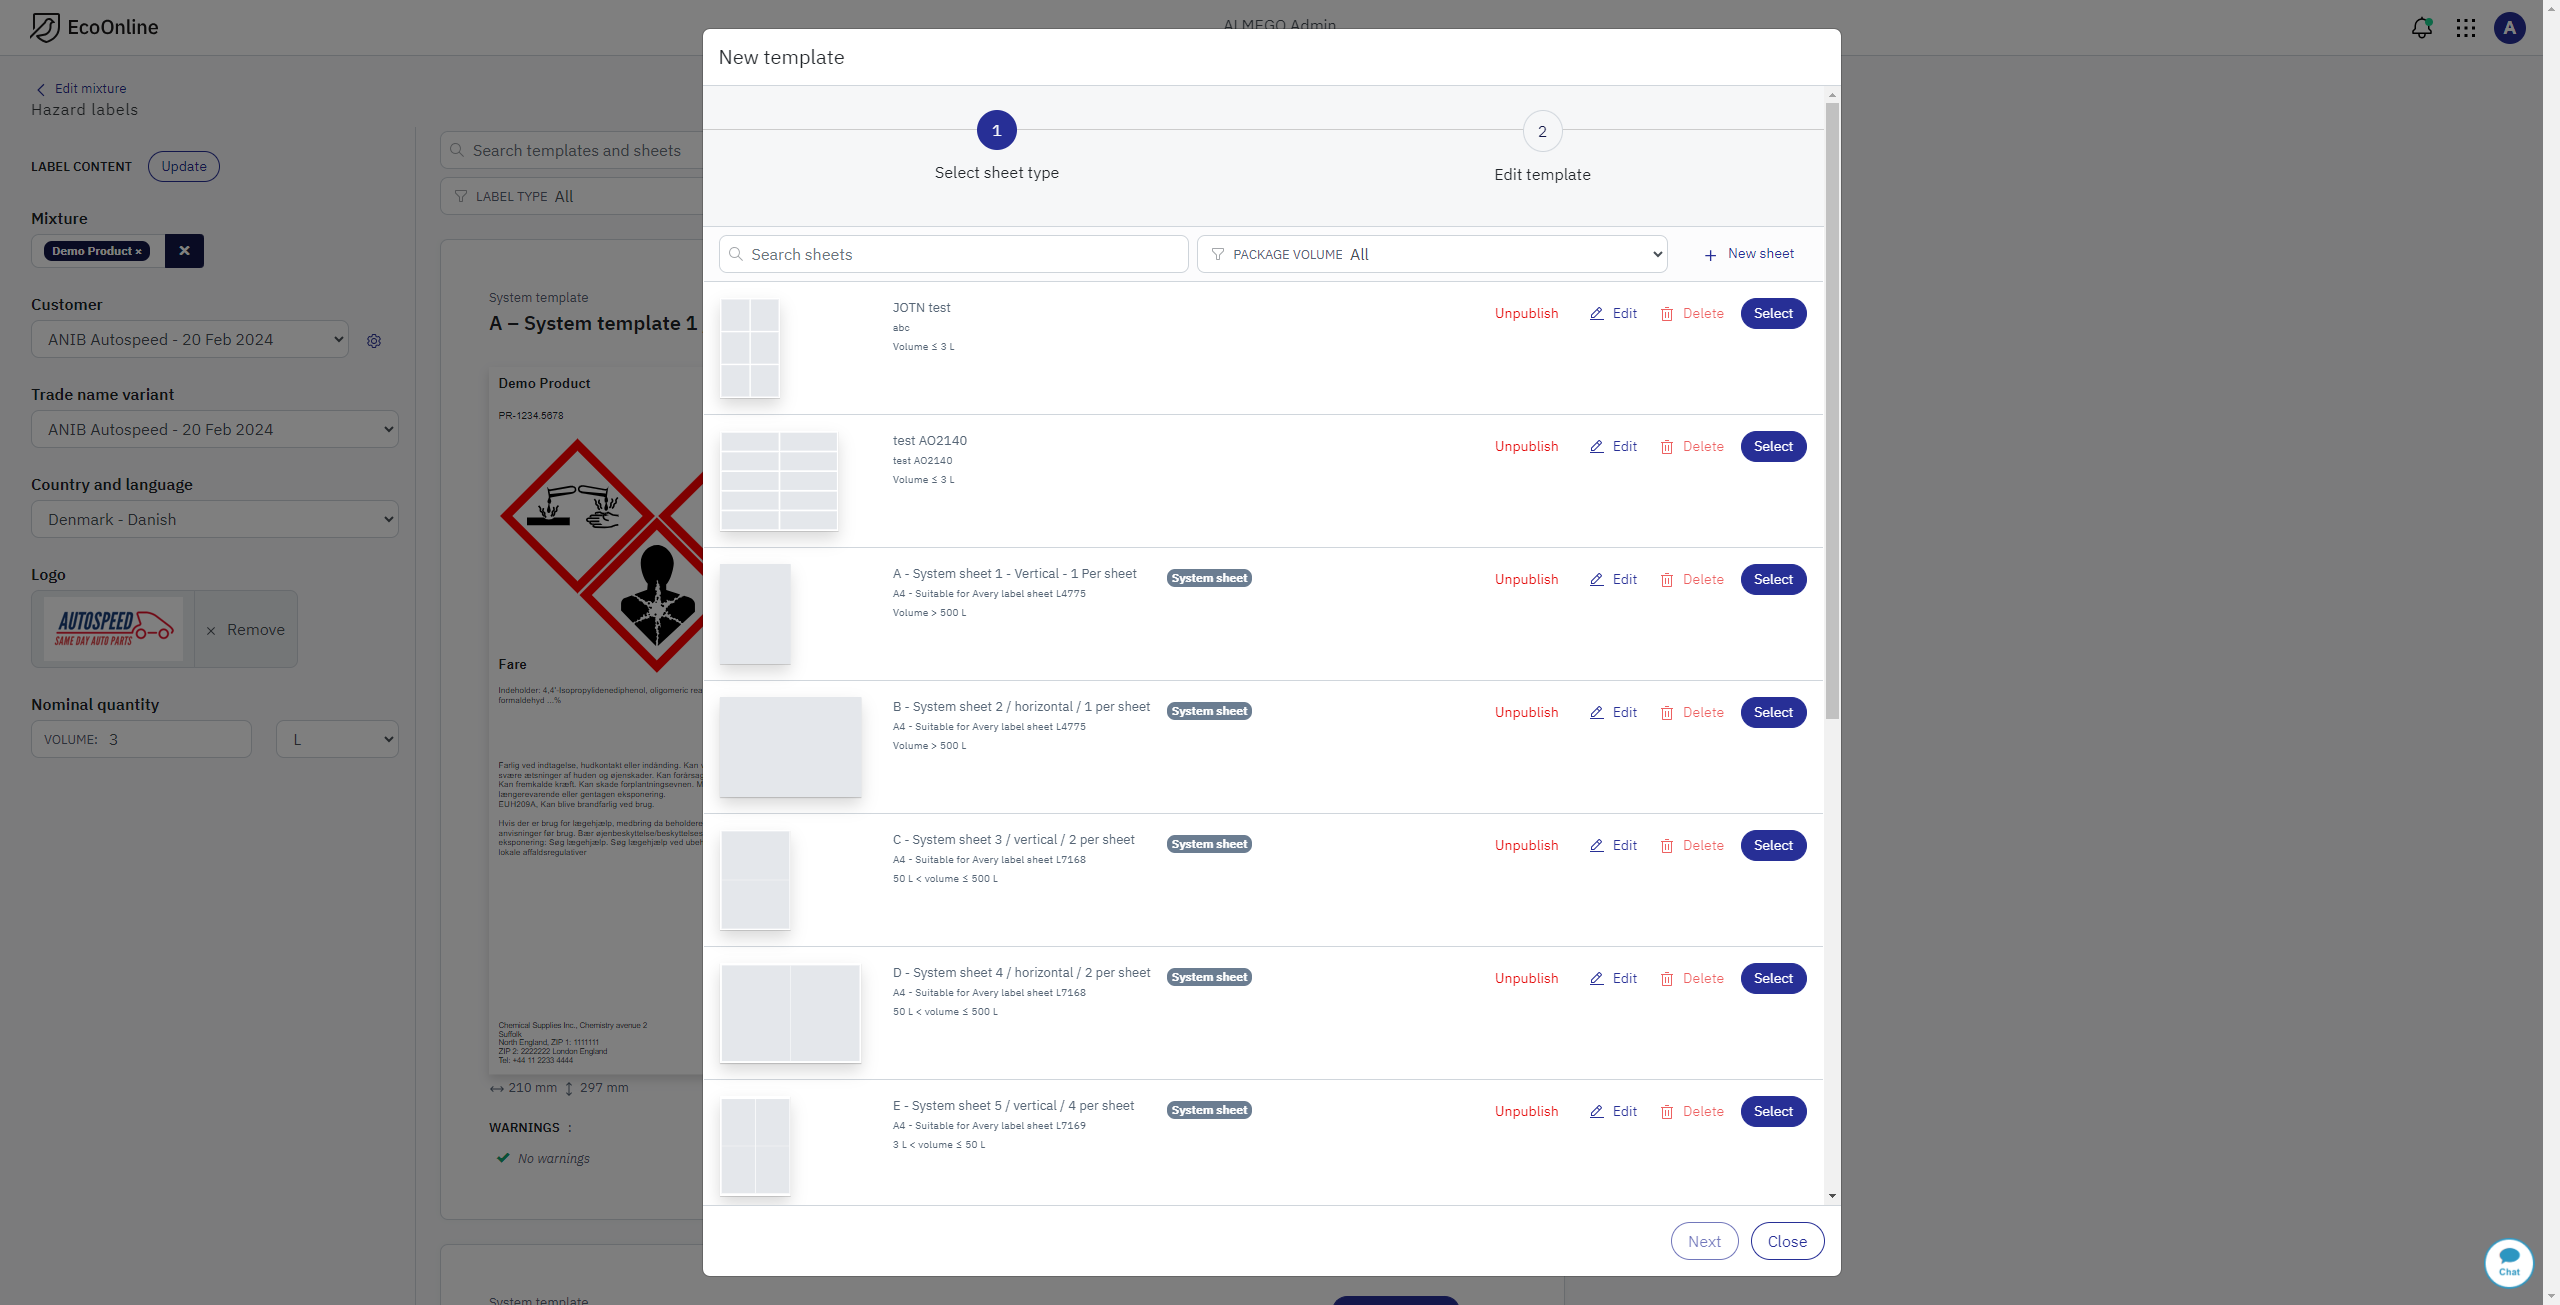
Final design — Admin interface: To manage print sheets and template designs.
VIDEO: Demo of the final UI.
Open to work I'm available for new UX design positions and projects — either remote/hybrid or located near Aarhus, Denmark.